SAP HANA Bulk Loader
Description
This step allows you to bulk load data into your SAP HANA database table. When bulk loading data into SAP HANA, you may want to consider some steps to optimize and tune the data load performance. It is recommended that you read the article "Best Practices for SAP HANA Data Loads" published on the SAP HANA Blog. In particular, keep the following suggestions in mind when using this step.
- Review the documentation for the following fields on the Options Tab to optimize performance of the import process:
- Thread Count
- Batch Size
- Type check
- Table lock
- Depending on the layout of your data and how you plan to use it, such as for analysis, you may want to create a column-based table to increase efficiency. For example, use "CREATE COLUMN TABLE".
- Disable the automerge feature before the bulk load and then enable it again after the import process is complete. You can accomplish this task within a PDI job and fire SQL statements such as, "ALTER TABLE tablename DISABLE AUTOMERGE; // ALTER TABLE tablename ENABLE AUTOMERGE;)"
Important: If you are loading data which displays as decimal values, it is recommended that you define the length and precision of the column you want to load.
Prerequisites
To use the SAP HANA Bulk Loader, you will need to meet the following conditions:
- Pentaho Data Integration (PDI) 5.4.X or higher installed.
- A SAP HANA database.
- SAP HANA JDBC drivers are shipped with the database. Be sure the JDBC driver (ngdbc.jar) is located in the pdi-ee\data-integration\lib\ folder.
- The SAP HANA Bulk Loader step is shipped as a plugin. You must manually install the SAP HANA Bulk Loader plugin to use it.
- The SAP HANA user configured in the connection must either be assigned the 'Admin' role, or be granted the 'Import' system permission and the 'Insert' permission for the table.
Installation
Install the SAP HANA Bulk Loader plugin.
- Extract the contents of the ZIP-Archive pdi-hana-plugin.zip to the plugins folder in the directory where you have installed PDI. If you used the Installation Wizard, this folder will mostly like be located here: pentaho\design-tools\data-integration\plugins.
- Start Pentaho Data Integration and create a new transformation.
- Under the Design tab, expand the Bulk Loading folder and select the SAP HANA Bulk Loader step.
Options
The SAP HANA Bulk Loader step offers several tabs with fields. Each tab is described below.
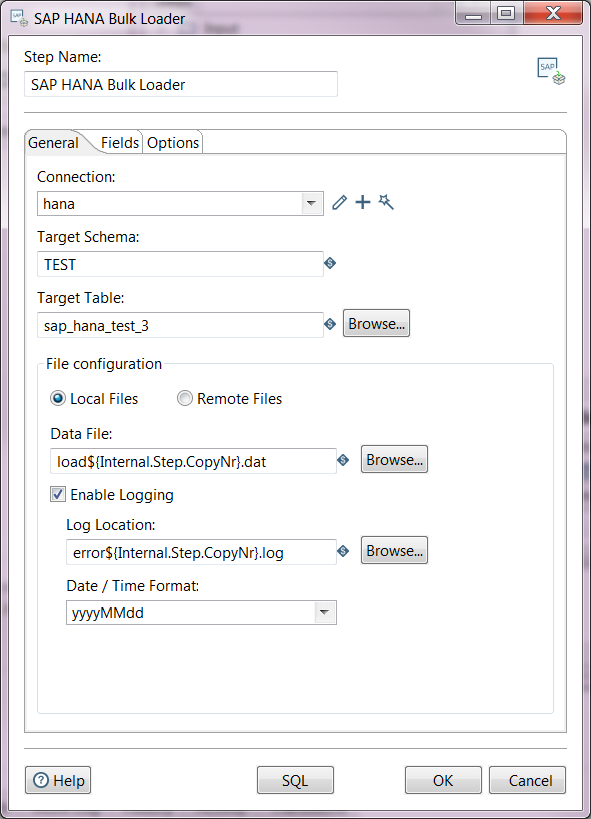
General Tab
Enter information in the following fields.
Option |
Description |
|
|---|---|---|
Step Name |
Enter the name of this step as it appears in the transformation workspace. This name must be unique within a single transformation. |
|
Connection |
Select the drop-down menu to select the 'SAP HANA' database connection type. Note that this list is populated only once a database connection has already been established. If no database connection has been established, this list will be blank. Click the Edit, New, and Wizard icons to create or select a connection with the type 'SAP HANA'. |
|
Target Schema |
Enter the name of the schema for the table in to write data to. This field is important for data sources which allow for table names containing periods ('.') in them. |
|
Target Table |
Enter the name of the target table. Click the Browse button to view options. |
|
File Configuration |
|
|
Data File |
When the Local Files option is selected, use this field to specify the variable which will name the file created by in the step, according to the mapping. This file will contain the data to be loaded into the database. Optionally, you can select the Browse button to search your system's local files. |
|
VFS URL |
When the Remote Files option is selected, enter the complete file path needed for accessing the files containing the data you want to import.
|
|
Remote Data File |
When the Remote Files option is selected, use this field to specify the variable which will name the file created by the step, according to the mapping. This file will contain the data to be loaded into the database. Optionally, you can select the Browse button to search file locations. |
|
Enable Logging |
Select this check box to turn on error logging. When this check box is selected, the following fields are available for editing:
|
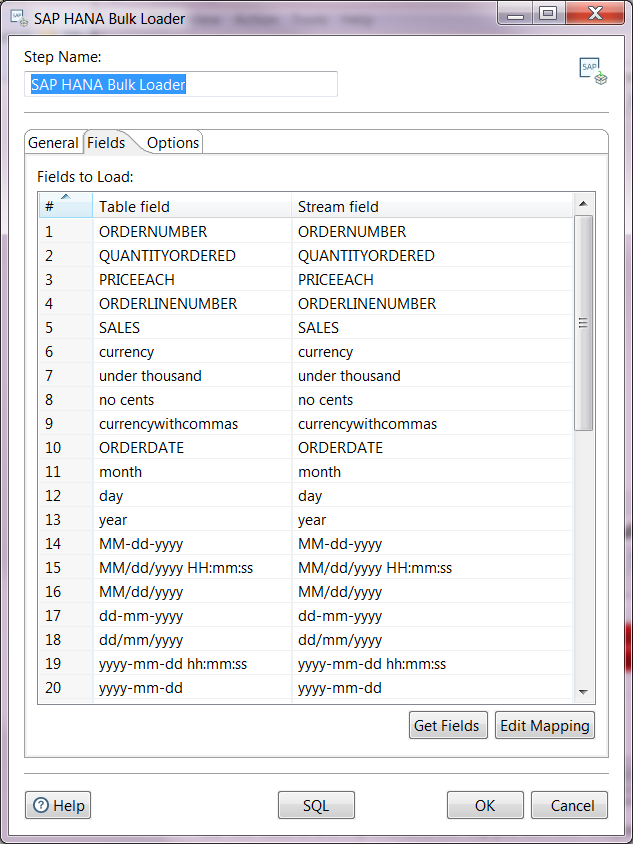
Fields Tab
Use this tab to set up you field mapping for the bulk loading process.
Option |
Description |
|---|---|
Table field |
The name of the table column to be loaded in the SAP HANA table. |
Stream field |
The name of the field to be taken from the incoming rows. |
- Click the Get Fields button to load the fields from the stream.
- Click the Edit Mapping button to edit the mapping from the stream to the table fields when the table already exists.
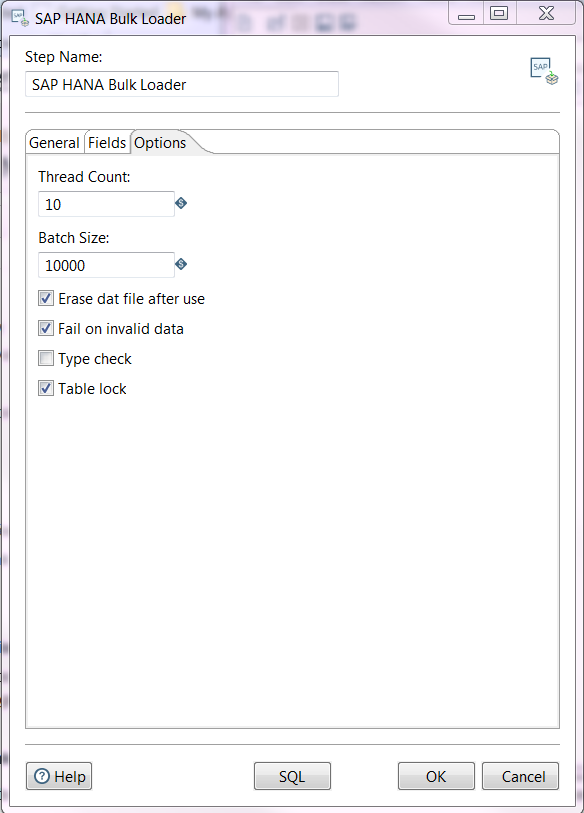
Options Tab
Enter information in the following fields.
Option |
Description |
|---|---|
Thread Count |
Enter the number of threads to use for a concurrent import. This field is useful for achieving optimal performance by enabling parallel loading. In general, for column tables, the recommended setting is '10' for parallel loading threads. The maximum number for this field is '256'. Optionally, you can enter a system parameter instead of numbers. |
Batch Size |
Enter the number of records to be imported. This field is useful for achieving optimal performance. The recommended setting is '10,000'. |
Erase dat file after use |
Select this check box to erase the data file (.dat) when the import is successfully completed. |
Fail on invalid data |
Select this check box to fail the import unless all the entries have imported successfully. |
Type check |
Select this check box if you want the system to check whether the data type is valid in each field before the record is imported. This type check is useful for achieving optimal performance. For example, you may want to select this option if you want to import a large file with little configuration. When this check box is cleared, the record will be inserted into the table without checking the data type of each field which may improve the performance of the import process. |
Table lock |
Select this check box to lock the target table such that no one can modify the table during the import process. Locking the table is useful for achieving optimal performance by potentially allowing for a faster import of column store tables. |
SQL button
Click the SQL button to generate the SQL to create the output table automatically.


