Create Mapper Transformation to Parse Weblog File
Create a Mapper Transformation to Parse the Raw Weblog Data File
In this task you will create a mapper transformation that will parse the weblog file into an easier to use format.
Speed Tip
You can download the Kettle Transformation weblog_parse_mapper.ktr already completed
- Start PDI on your desktop. Once it is running choose 'File' -> 'New' -> 'Transformation' from the menu system or click on the 'New file' icon on the toolbar and choose the 'Transformation' option.
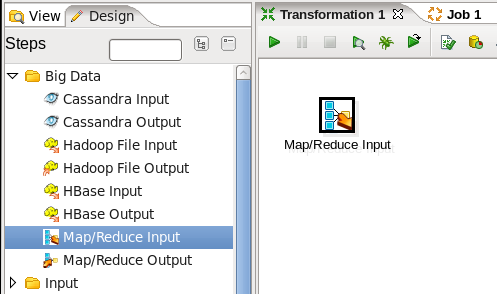
- Add a Map/Reduce Input Step: You are going to read data as a mapper transformation, so expand the 'Big Data' section of the Design palette and drag a 'Map/Reduce Input' node onto the transformation canvas. Your transformation should look like:
- Edit the Map/Reduce Input Step: Double-click on the 'Map/Reduce Input' node to edit its properties. Enter this information:
- Key Field Type: Enter String
- Value Field Type: Enter String
When you are done your 'Map/Reduce Input' window should look like this:
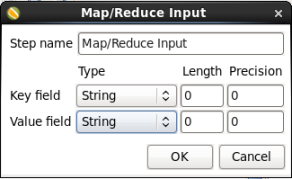
Click 'OK' to close the window.
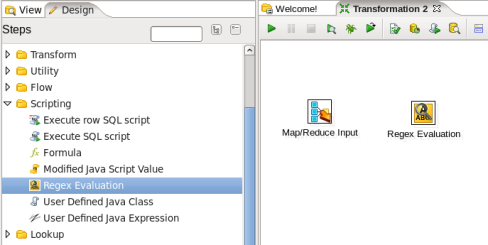
- Add a Regex Evaluation Step: You need to parse the record using a regular expression to get the information from the web log, so expand the 'Scripting' section of the Design palette and drag a 'Regex Evaluation' node onto the transformation canvas. Your transformation should look like:
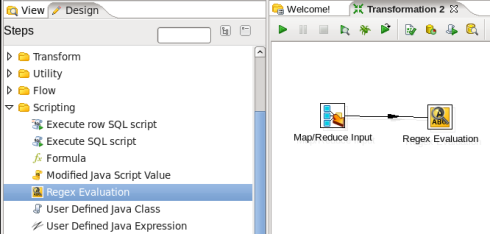
- Connect the Input and Regex Evaluation Steps: Hover the mouse over the 'Map/Reduce Input' node and a tooltip will appear. Click on the output connector (the green arrow pointing to the right) and drag a connector arrow to the 'Regex Evaluation' node. Your canvas should look like this:
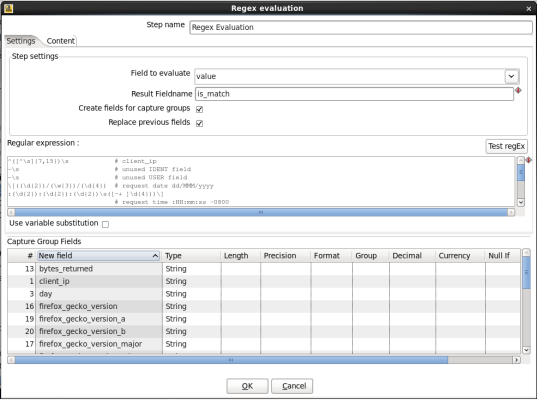
- Edit the Regex Evaluation Step: Double-click on the 'Regex Evaluation' node to edit its properties. Enter this information:
- Field to evaluate: Enter 'value'
- Result Fieldname: Enter 'is_match'
- Check 'Create fields for capture groups'
- Regular Expression: Enter
^([^\s]{7,15})\s # client_ip -\s # unused IDENT field -\s # unused USER field \[((\d{2})/(\w{3})/(\d{4}) # request date dd/MMM/yyyy :(\d{2}):(\d{2}):(\d{2})\s([-+ ]\d{4}))\] # request time :HH:mm:ss -0800 \s"(GET|POST)\s # HTTP verb ([^\s]*) # HTTP URI \sHTTP/1\.[01]"\s # HTTP version (\d{3})\s # HTTP status code (\d+)\s # bytes returned "([^"]+)"\s # referrer field " # User agent parsing, always quoted. "? # Sometimes if the user spoofs the user_agent, they incorrectly quote it. ( # The UA string [^"]*? # Uninteresting bits (?: (?: rv: # Beginning of the gecko engine version token (?=[^;)]{3,15}[;)]) # ensure version string size ( # Whole gecko version (\d{1,2}) # version_component_major \.(\d{1,2}[^.;)]{0,8}) # version_component_minor (?:\.(\d{1,2}[^.;)]{0,8}))? # version_component_a (?:\.(\d{1,2}[^.;)]{0,8}))? # version_component_b ) [^"]* # More uninteresting bits ) | [^"]* # More uninteresting bits ) ) # End of UA string "? " - Capture Group Fields: Add the following all with Type String
- client_ip
- full_request_date
- day
- month
- year
- hour
- minute
- second
- timezone
- http_verb
- uri
- http_status_code
- bytes_returned
- referrer
- user_agent
- firefox_gecko_version
- firefox_gecko_version_major
- firefox_gecko_version_minor
- firefox_gecko_version_a
- firefox_gecko_version_b
When you are done your 'Regex Evaluation' window should look like this:
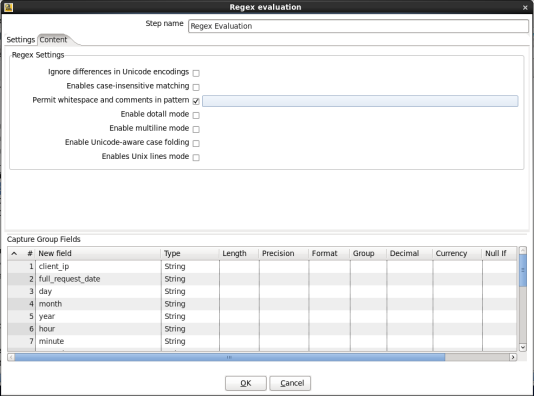
- Permit whitespace and comments in regular expression: Switch to the 'Content' tab and check the 'Permit whitespace and comments in pattern' option. When you are done your window should look like:
Click 'OK' to close the window.
- Add a Filter Rows Step: You should always ensure you do not have any bad rows in your file that may break future processing, so expand the 'Flow' section of the Design palette and drag a 'Filter Rows' node onto the transformation canvas. Your transformation should look like:
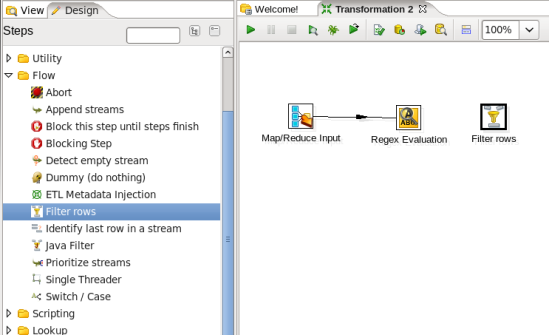
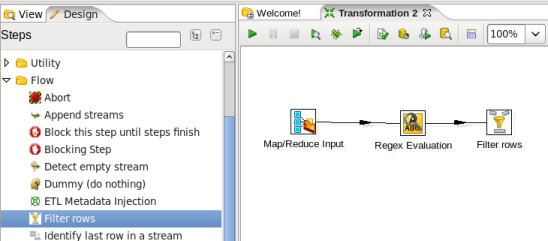
- Connect the Regex Evaluation and Filter Rows Steps: Hover the mouse over the 'Regex Evaluation' node and a tooltip will appear. Click on the output connector (the green arrow pointing to the right) and drag a connector arrow to the 'Filter Rows' node. Your canvas should look like this:
- Edit the Filter Rows Step: Double-click on the 'Filter Rows' node to edit its properties. Enter this information:
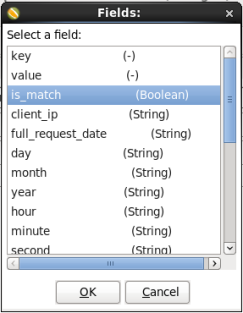
- Click the <field> box to the left of the '=' box
- A 'Select a field:' window will appear. Select 'is_match' and click 'OK'.
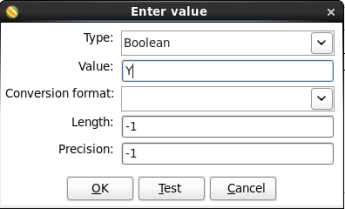
- Click the <value> box
- A 'Enter value' box will appear. Enter 'Y' for Value and click 'OK'.
When you are done your window should look like:
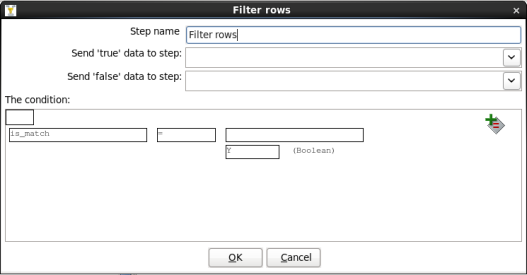
Click 'OK' to close the window.
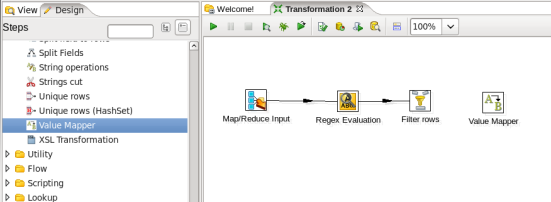
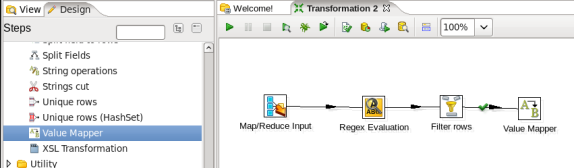
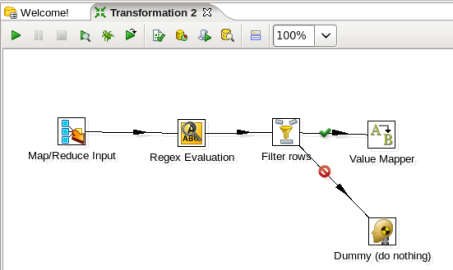
- Add a Value Mapper Step: You may want to be able to use the month number instead of the 3 letter month, so expand the 'Transform' section of the Design palette and drag a 'Value Mapper' node onto the transformation canvas. Your transformation should look like:
- Connect the Filter Rows and Value Mapper Steps: Hover the mouse over the 'Filter Rows' node and a tooltip will appear. Click on the output connector (the green arrow pointing to the right) and drag a connector arrow to the 'Value Mapper' node. When you release the mouse and a window appears
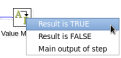 select the 'Result is TRUE' option. Your canvas should look like this:
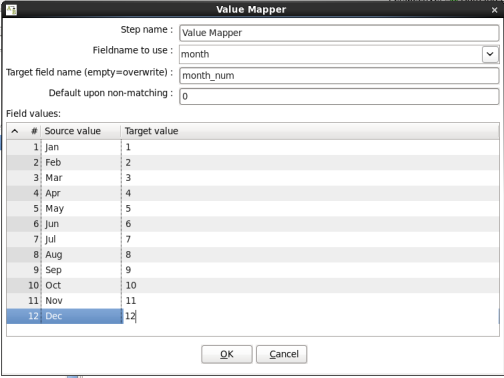
- Edit the Value Mapper Step: Double-click on the 'Value Mapper' node to edit its properties. Enter this information:
- Fieldname to use: Select 'month'
- Target field name: Enter 'month_num'
- Default upon non-matching: Enter '0'
- Field Values: Enter the following:
Source Value
Target Value
Jan
1
Feb
2
Mar
3
Apr
4
May
5
Jun
6
Jul
7
Aug
8
Sep
9
Oct
10
Nov
11
Dec
12
When you are done your window should look like:
Click 'OK' to close the window.
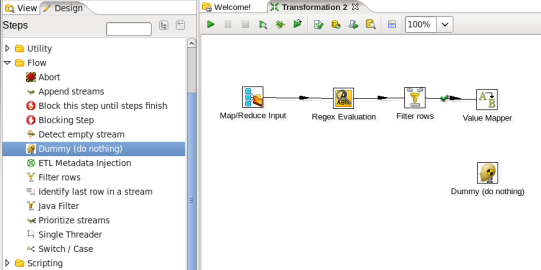
- Add a Dummy Step: You always have to tell a Filter Rows node what to do with the rows that do not match, in this case we do not want to do anything with them, so expand the 'Flow' section of the Design palette and drag a 'Dummy (do nothing)' node onto the transformation canvas. Your transformation should look like:
- Connect the Filter Rows and Dummy Steps: Hover the mouse over the 'Filter Rows' node and a tooltip will appear. Click on the output connector (the green arrow pointing to the right) and drag a connector arrow to the 'Dummy (do nothing)' node. When you release the mouse and a window appears. Select the 'Result is FALSE option. Your canvas should look like this:
- Add a User Defined Java Expression Step: You need to concatenate your output fields together as a mapper transformation may only have two output fields a key and a value, so expand the 'Scripting' section of the Design palette and drag a 'User Defined Java Expression' node onto the transformation canvas. Your transformation should look like:
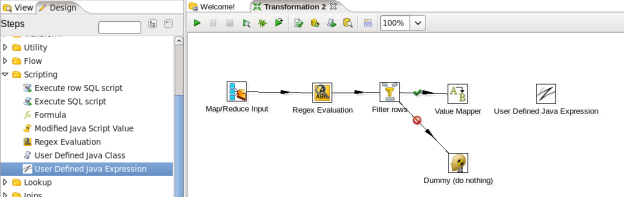
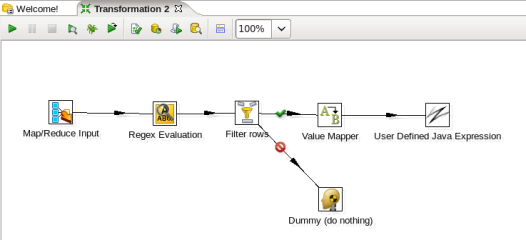
- Connect the Value Mapper and Java Expression Steps: Hover the mouse over the 'Value Mapper' node and a tooltip will appear. Click on the output connector (the green arrow pointing to the right) and drag a connector arrow to the 'User Defined Java Expression' node. Your canvas should look like this:
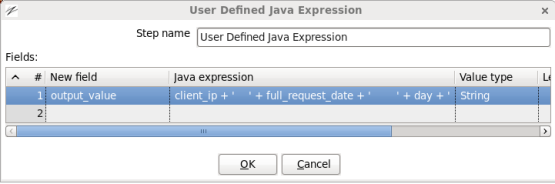
- Edit the User Defined Java Expression Step: Double-click on the 'User Defined Java Expression' node to edit its properties. Enter this information:
- New field: Enter 'output_value'
- Java Expression: Enter
client_ip + '\t' + full_request_date + '\t' + day + '\t' + month + '\t' + month_num + '\t' + year +
'\t' + hour + '\t' + minute + '\t' + second + '\t' + timezone + '\t' + http_verb + '\t' + uri + '\t' +
http_status_code + '\t' + bytes_returned + '\t' + referrer + '\t' + user_agent
- Value Type: Select 'String'
When you are done your window should look like:
Click 'OK' to close the window.
- Add a Map/Reduce Output Step: You need to output your results to the Map/Reduce framework, so expand the 'Big Data' section of the Design palette and drag a 'Map/Reduce Output' node onto the transformation canvas. Your transformation should look like:
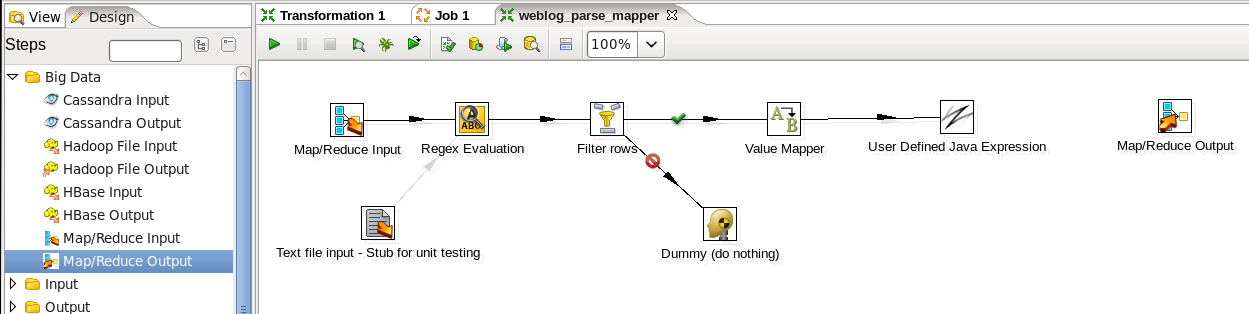
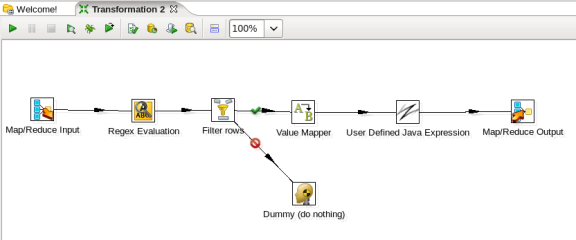
- Connect the Java Expression and Output Steps: Hover the mouse over the 'User Defined Java Expression' node and a tooltip will appear. Click on the output connector (the green arrow pointing to the right) and drag a connector arrow to the 'Map/Reduce Output' node. Your canvas should look like this:
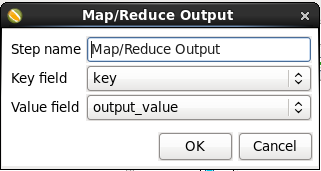
- Edit the Output Step: Double-click on the 'Map/Reduce Output' node to edit its properties. Enter this information:
- Key field: Select 'key'
- Value field: select 'output_value'
When you are done your window should look like:
Click 'OK' to close the window.
- Save the Transformation: Choose 'File' -> 'Save as...' from the menu system. Save the transformation as 'weblog_parse_mapper.ktr' into a folder of your choice.
, multiple selections available,