| Excerpt |
|---|
June 8, 2006 |
Quick Background
Sometimes, it isn't possible to be able to pre-define your query as a resource or an input to report. Sometimes, it becomes necessary to generate your query (whether it's SQL, MDX, or whatever) using a programming language (such as javascript). Examples of this requirement may involve:
...
Otherwise, the report defaults were used to generate this simple report.
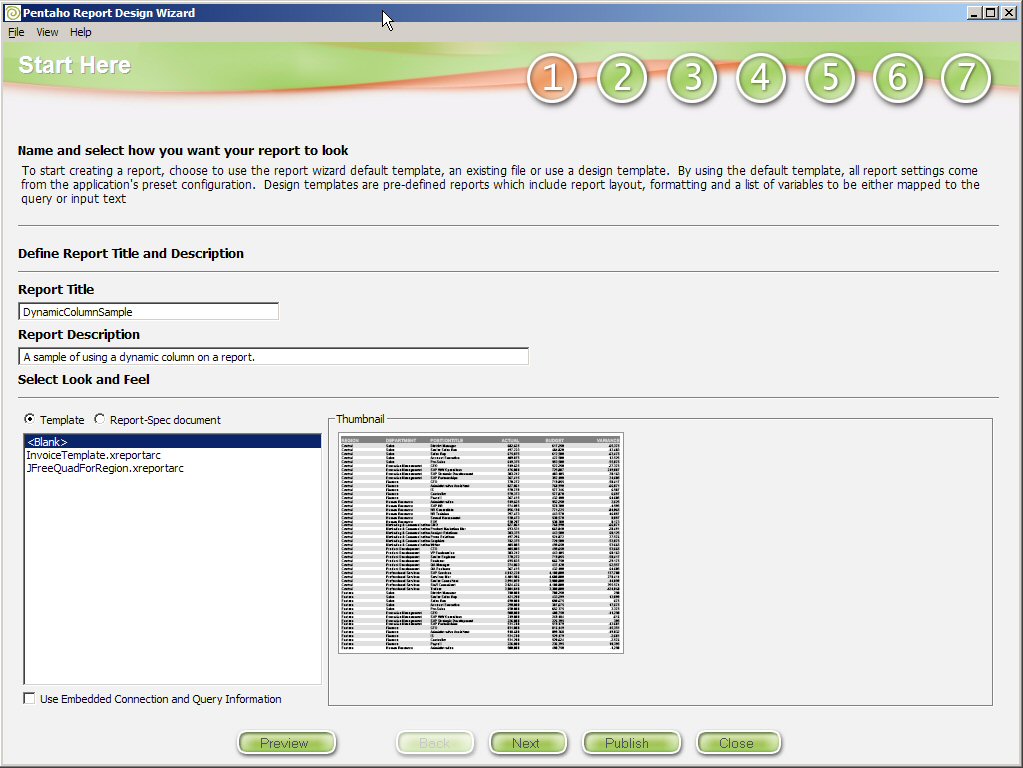
STEP 1: Report Title and Description
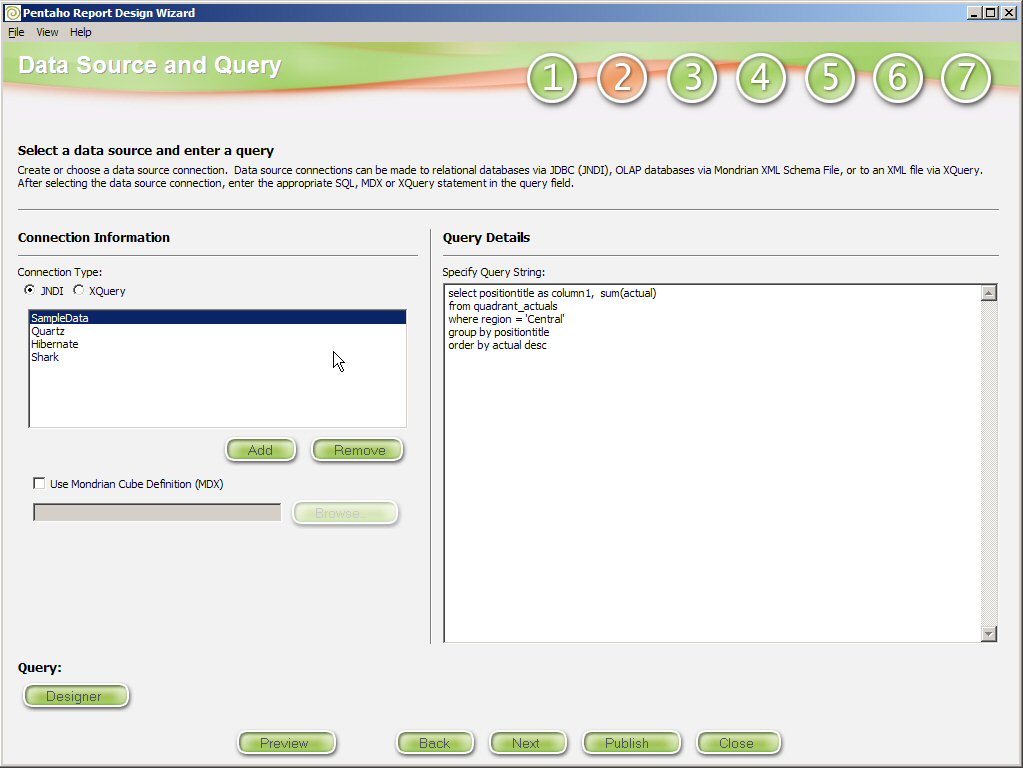
STEP 2: Select a Datasource and Query
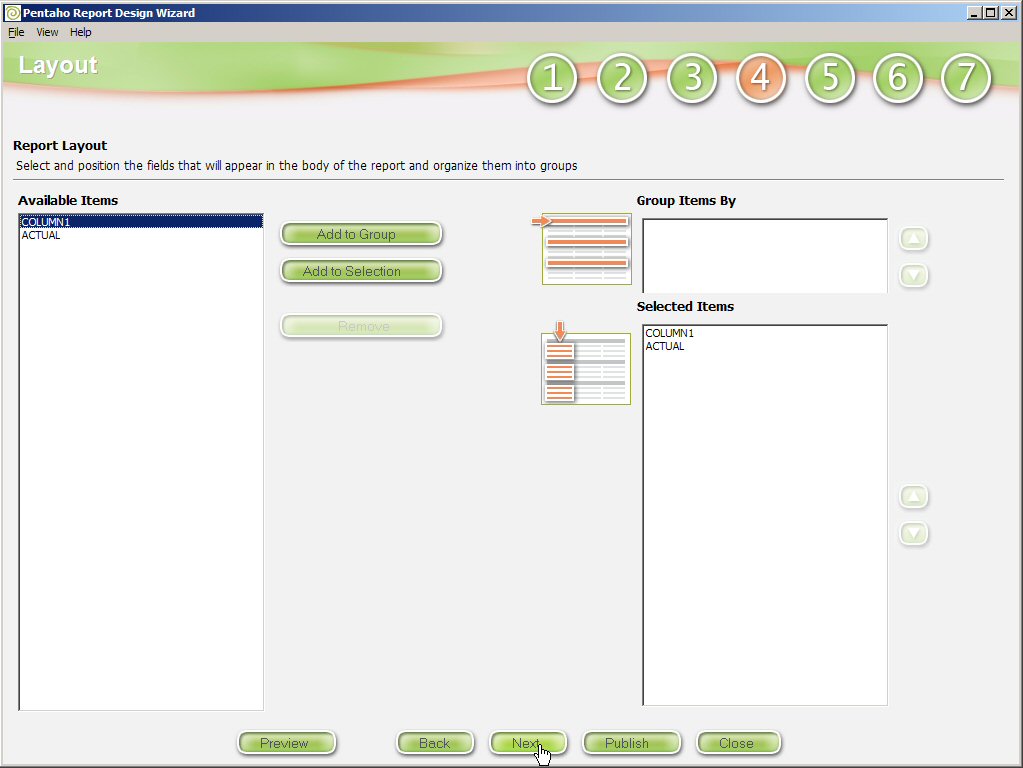
STEP 4: Report Layout
STEP 5: Describing Actual
...
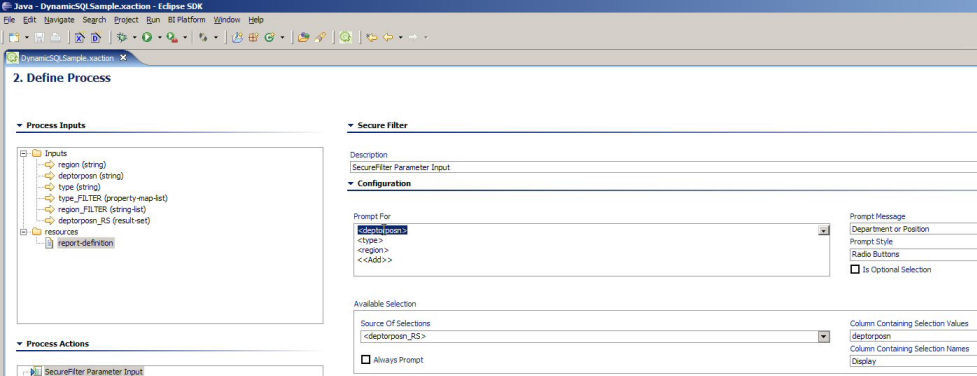
- The first action we will define uses the SecureFilterComponent to describe the parameters that we want to prompt a user of our action sequence to fill in.
- Right-click on the Process Actions box on the left hand side of the pane and select Add | Secure Filter.
- Drag FROM the Process Inputs box to the Prompt For box on the right the inputs region, type and deptorposn.
- Click on the region Input in the Prompt For box. Type in "Region:" for the Prompt Message, Select "Pulldown" as the Prompt Style and select <region_Filter> as the Source of Selections. Leave the Column Containing... fields blank, they are not needed for this input.
- Click on the type Input in the Prompt For box. Type in "Report Format:" for the Prompt Message, Select "Pulldown" as the Prompt Style and select <type_FILTER> as the Source of Selections. Column Containing Selection Values should be "type", Column Containiing Selection Names should be "Display". You should have defined the names of these columns when you set up the Inputs, refer back to the type_FILTER input of you don't make this connection, its an important one!
- Click on the deptorposn Input in the Prompt For box. Type in "Department or Position :" for the Prompt Message, Select "Radio Buttons" as the Prompt Style and select <deptorposn_RS> as the Source of Selections. Column Containing Selection Values should be "deptorposn", Column Containiing Selection Names should be "Display". You should have defined the names of these columns when you set up the Inputs, refer back to the deptorposn_RS input of you don't make this connection, its an important one!
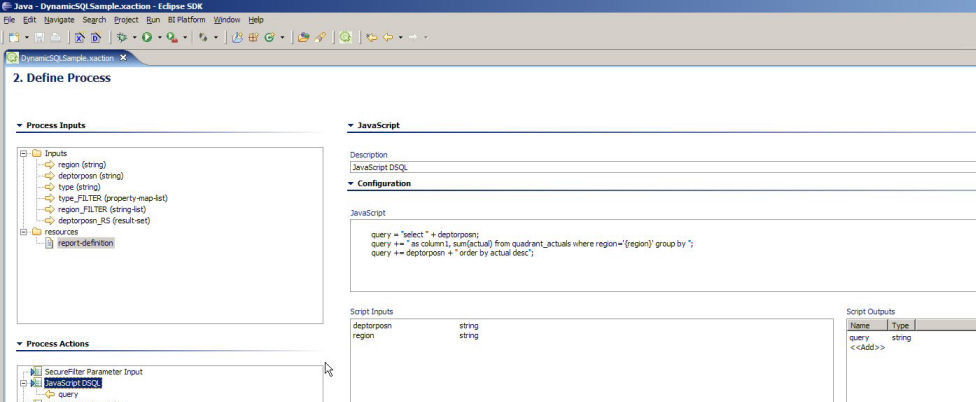
- Next we will define the Javascript rule for our query. Right-click on the Process Actions box on the left hand side of the pane and select Add | Javascript.
- In the Javascript box, enter the following Javascript:
Panel Wiki Markup Code Block query = "select " + deptorposn;query += " as column1, sum(actual) from quadrant_actuals where region='{region}' group by ";query += deptorposn + " order by actual desc"; - Drag FROM the Process Inputs box to the Script Inputs box on the right the inputs region and deptorposn.
- In the Script Outputs box, enter an output named "query" with a type of "string ".
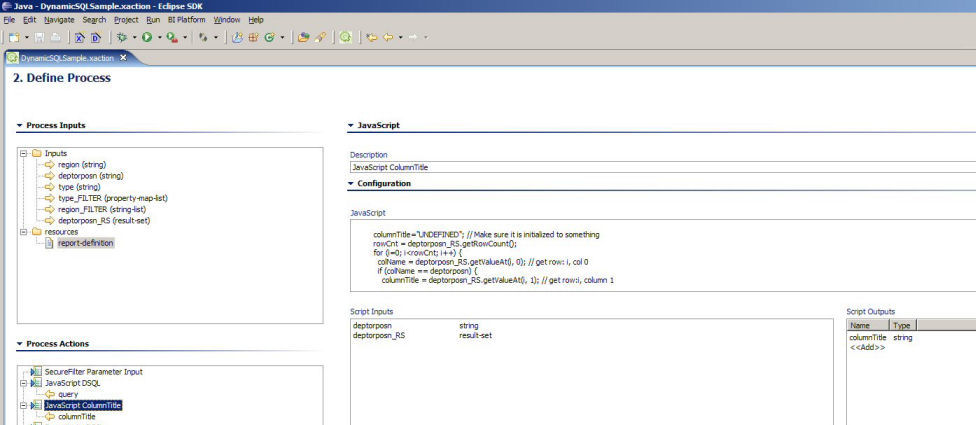
- The last new action we need to define is the Javascript rule for looking up the name of the dynamic column. Right-click on the Process Actions box on the left hand side of the pane and select Add | Javascript.
- In the Javascript box, enter the following Javascript:
Panel Wiki Markup Code Block columnTitle="UNDEFINED"; // Make sure it is initialized to somethingrowCnt = deptorposn_RS.getRowCount();for (i=0; i < rowCnt; i++) {colName = deptorposn_RS.getValueAt(i, 0); // get row: i, col 0if (colName == deptorposn) {columnTitle = deptorposn_RS.getValueAt(i, 1); // get row:i, column 1break;} } - Drag FROM the Process Inputs box to the Script Inputs box on the right the inputs region deptorposn_RS, and deptorposn.
- In the Script Outputs box, enter an output named "columnTitle" with a type of "string ".
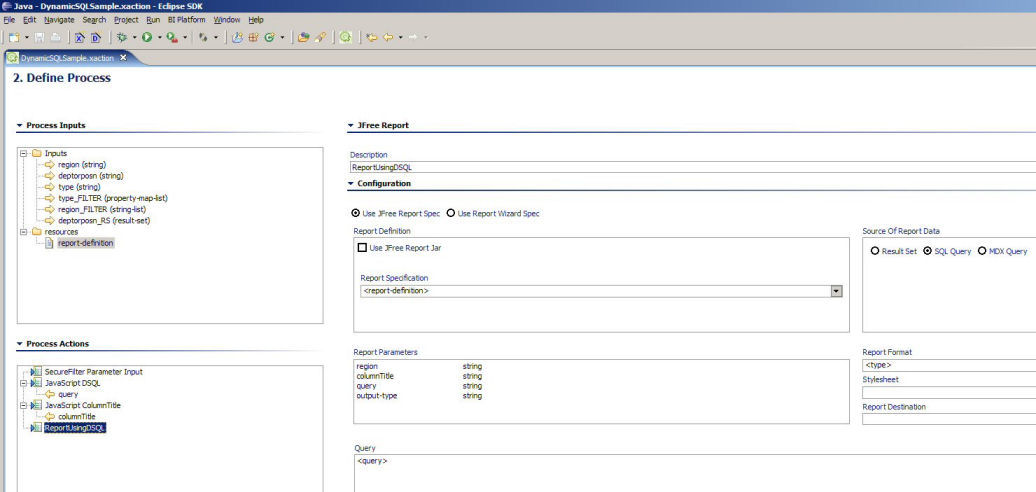
- And finally, a little twddling of our report action definition, as we will be ready to test our solution. Click on the report action in the Process Actions box.
- Drag FROM the Process Inputs box to the Report Parameters box on the right the inputs region and type.
- Drag FROM the Process Actions box (under the query Javascript action) to the Report Parameters box on the right the output query.
- Drag FROM the Process Actions box (under the column title Javascript action) to the Report Parameters box on the right the output columnTitle.
- Make sure that <type> is selected in the Report Format pulldown.
- In the Query box on the right, delete the query and replace it with <query> .
Testing the Action Sequence
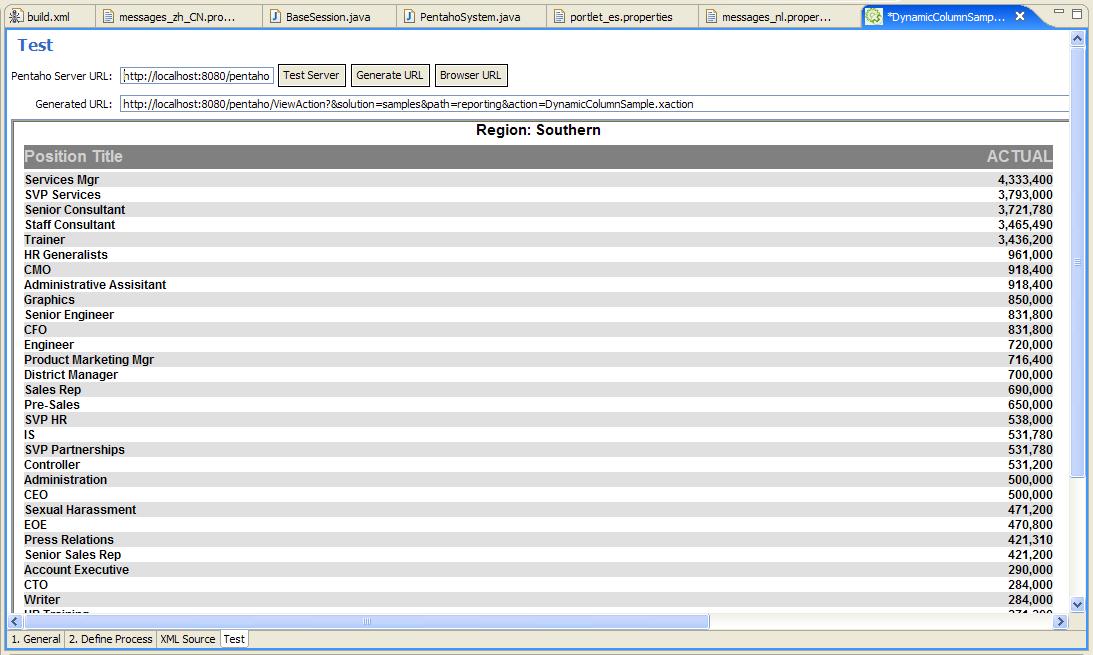
You have the ability to test the action sequence directly from the Pentaho Design Studio.
- First, make sure your Pre-configured Installation is up and running. If you don't know how to get it started, or are unsure as to whether it's already running, see the Pentaho Getting Started Guide for how to successfully start the server.
- Next make sure that the solution folders you are using with the Pre-configured Installation contains your new solution.
- Switch to the Test tab of the Action Sequence Editor. Verify that the "Server URL" at the top of the page is indeed the URL to your Pre-configured Installation by clicking the "Test Server" button. You will see see the home page of the Pre-configured Installation if all is operating properly.
- You should see the URL for the action sequence we want to test in the textbox labeled "Generated URL". Just after that text box is a "Run" button.
- Click the "Run" button to test your action sequence. You should see the prompt page asking for the report parameters. Select values for each parameter, and click Submit to view your report.
Should you encounter any problems or if you just want to peruse the solution, you can find the all of the files for this exercise here.
