...
Once again, be sure you have the following resources. I've listed the version numbers I used; perhaps our community members could post any successes or problems should you try this with other versions or configurations.
- Pentaho Pre-Configured Install, version 1.1.5 build 260 or later
- Pentaho Getting Started Guide, version 1.1.5 build 260 or later
- Pentaho Design Studio or the Action Sequence Eclipse Plugin Plugin , version 1.1.5 build 151 Pentaho Design Studio Useror later
- Pentaho Design Studio User's Guide, version 1.1.5 build 151 or later
Step-By-Step: How to Build Your Solution
- The first step in this exercise is to get the Design Studio installed and running on your computer. Refer to the Design Studio User's Guide to accomplish this step.
- You should have the Pentaho sample solution available on your computer. The sample solution comes bundled in the Pentaho Pre-Configured Install. If you haven't yet, unzip the PCI to a location on your computer that you will remember.
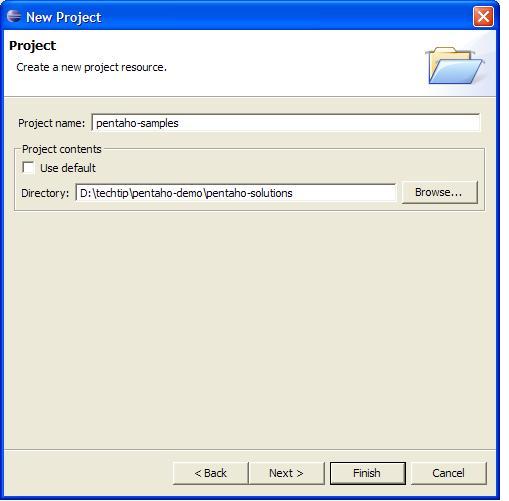
- The common way to work on Pentaho solutions is to set up your solution files as an Eclipse Simple Project. Since we are using the samples as our solution for this exercise, I will create an Eclipse Simple Project called "pentaho-samples", and point to the <pentaho-demo>/pentaho-solutions directory as my project directory.
- Once you have your Eclipse project set up, open the file <pentaho-samples>/samples/reporting/JFree_Quad.xaction. This action sequence already builds a JFreeReport. The document will open to the first tab in the Action Sequence Editor, the General tab. NOTE: If you don't want to modify the sample directly, do a Save As..., and name the new file Test_Quad.xaction. The new sample will show up in the PCI as a duplicate of the JFree_Quad sample, but will of course contain your new solution.
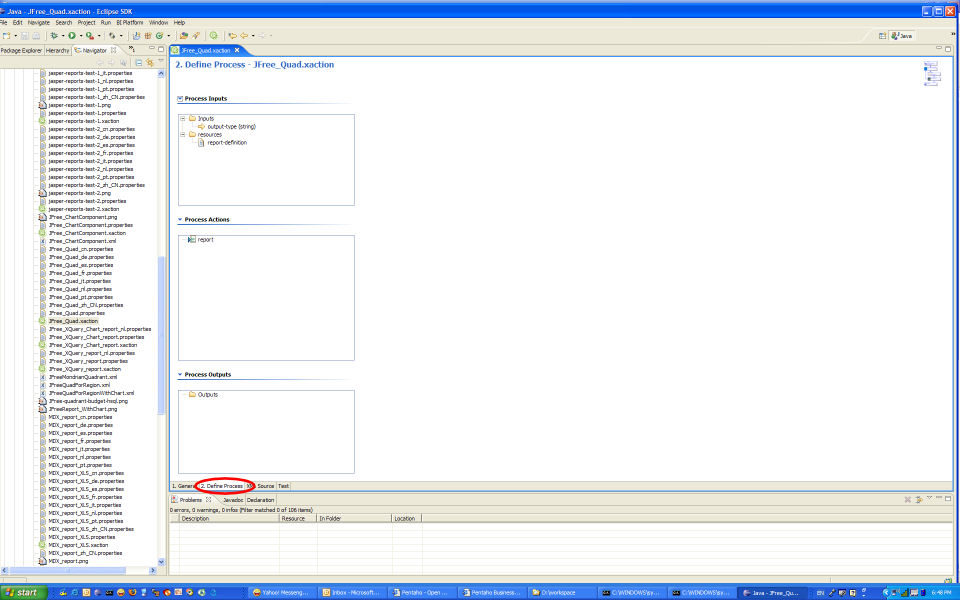
- Switch to the "Step 2. Define Process" tab in the Action Sequence Editor. Here is where the bulk of our work will be done.
Defining the Inputs
At the top of this tab, you should see a Process Inputs box. For our solution we need two process inputs. One is the input that will hold the list of Region values that we want to define. We will call this input REGION_SELECTIONS. We also need an input that will hold the selected Region. We will call this input REGION.
- Right-click on the folder named Inputs in the Process Inputs box. Select Add... | Input from the menu.
- In the new editor page, type REGION in the textbox labeled "Name". Leave the Type defaulted to string.
- Check the box labeled "Has Default Value". Set the default value to Central by typing Central in the text box labeled "Default Value".
- Add another input following the same steps, naming it "REGION_SELECTIONS".
- This time, change the value in the Type combobox to "result-set" by scrolling down in the list of options.
- Once again, select the "Has Default Value" checkbox. You should notice that the dialog has changed for setting the default value. You should see a two column table, columns named key0 and key1.
- Change the name of the columns to Name and Value, in that order. Select the first row in the table, right-click and select the "Manage Columns" option. You will be prompted with a dialog populated with the column names. Rename key0 to Name, and key1 to Value.

